Why I write more of my crochet patterns in joining rounds instead of spiral rounds
In a spiral round you keep going into the next round and track the start with a stitch marker. In a joining round you slip stitch into the first stitch and chain, which closes the round and ends it at the same height it started. I write more and more of my patterns in joining rounds, because there’s no stitch marker, the color changes are cleaner, and the shaping lands where I put it. The tradeoff is a seam.
The difference
I made a video explaining this, and the photos in this post are from it.
With a spiral round, when it’s time to go to your next round, you just go into the next stitch and put a stitch marker in it. The marker is the only thing that tells you where your round starts and ends.
With a joining round, instead of using a stitch marker, you slip stitch into that next stitch and chain. The join itself tells you where your next round begins and ends. And it ends your previous round at the same height as the first stitch of that round.
In my patterns a joining round looks like this:
Rnd 4: 10 sc, slst, ch 1 (10)
The slip stitch and the chain 1 don’t count. Ten stitches in, ten stitches out. If you want the long version of how I count rounds, I wrote that up separately.
I hate stitch markers
I don’t know about you, but I hate using a stitch marker. I hate having to put it on. I hate having to clip it, take it off, put it back. It’s just super annoying, especially if you’re crocheting something small in the round.
Imagine a really tight round, and now you have a stitch marker in it. You’re fighting with the stitch marker for space.
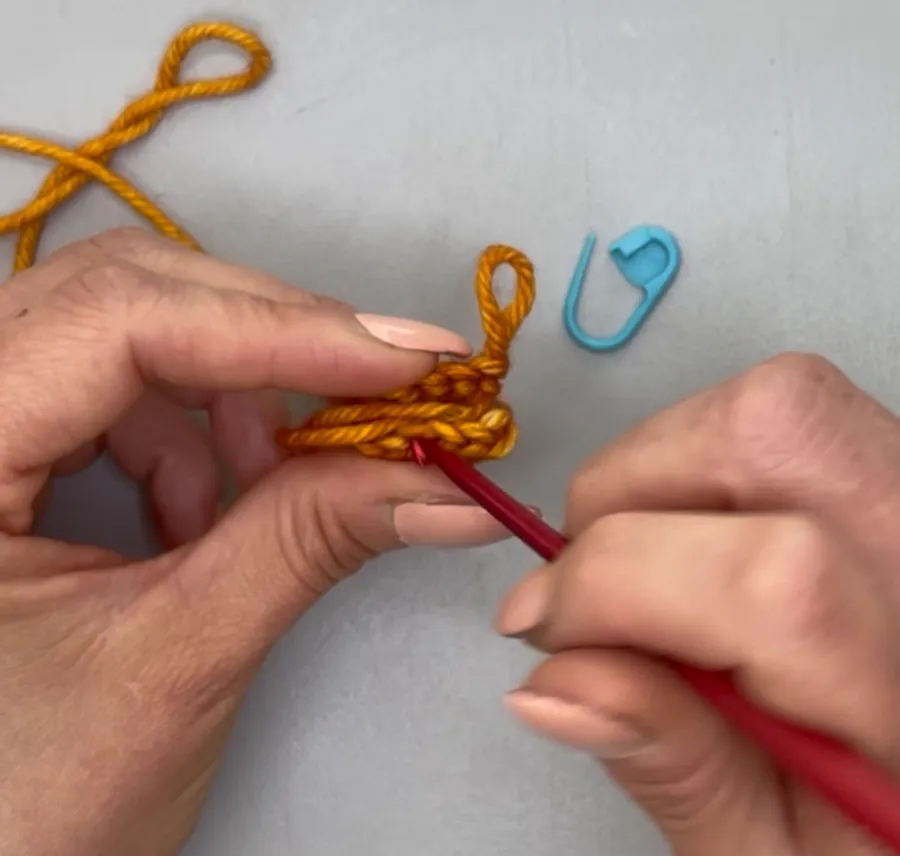
A joining round doesn’t need one. The join marks the start for you.
Color changes
This is a big part of why I prefer joining rounds.
In a spiral, the color change stacks on top of the previous round. The round is climbing the whole time, so where the new color starts, you get a step up instead of a clean line. With a joining round, every round ends at the height it started, so you don’t get that.
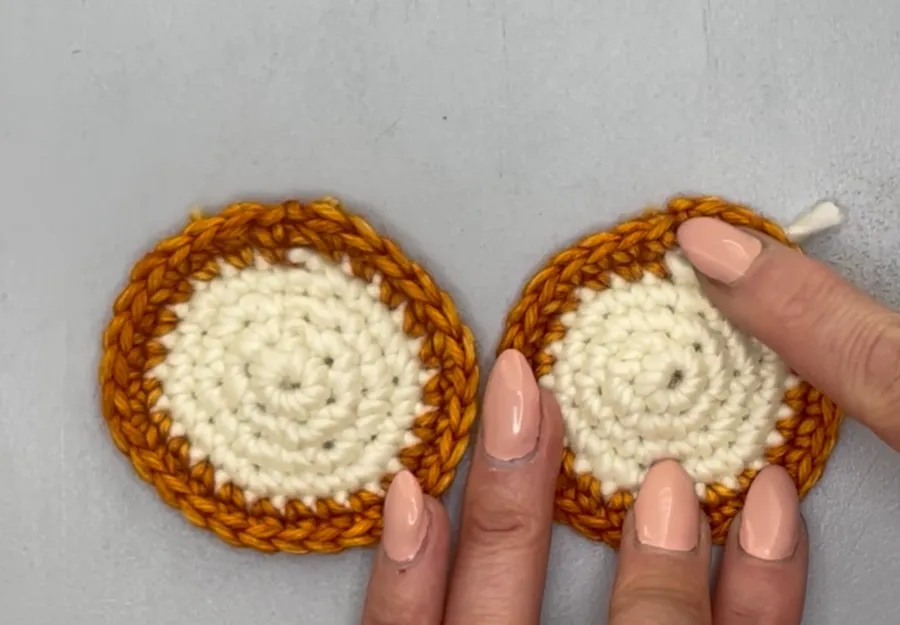
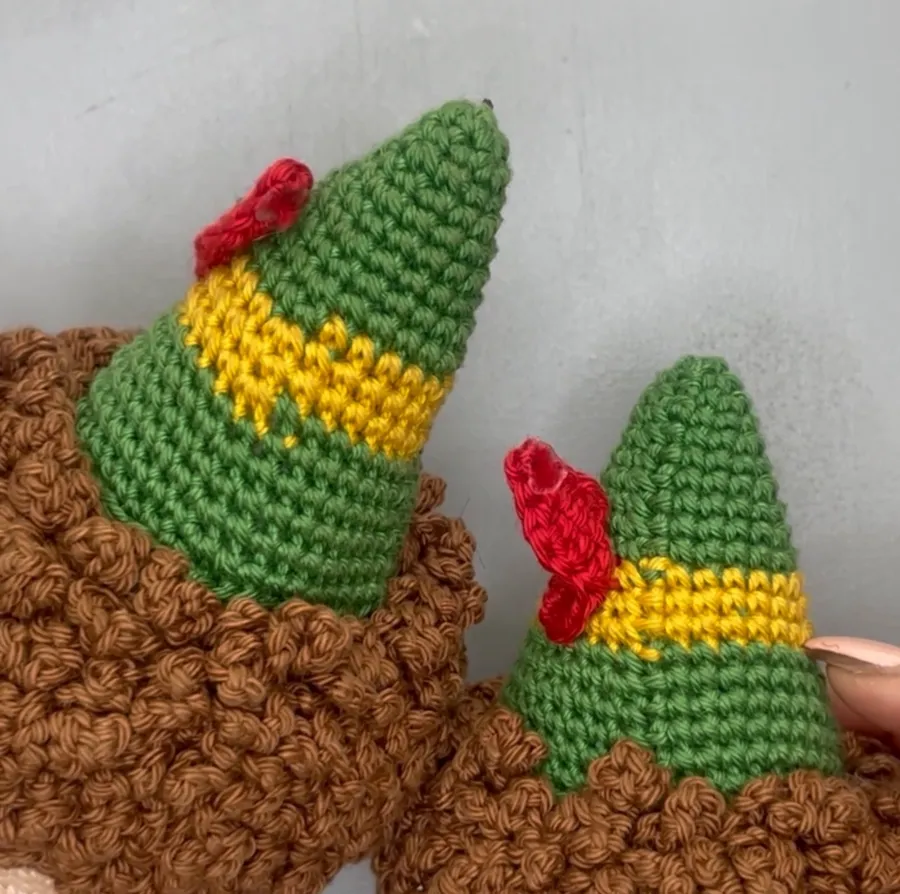
I’ve seen it in my own patterns. I made a hat in spiral rounds and you can see it doesn’t have a super clean color change, because of the stacking.
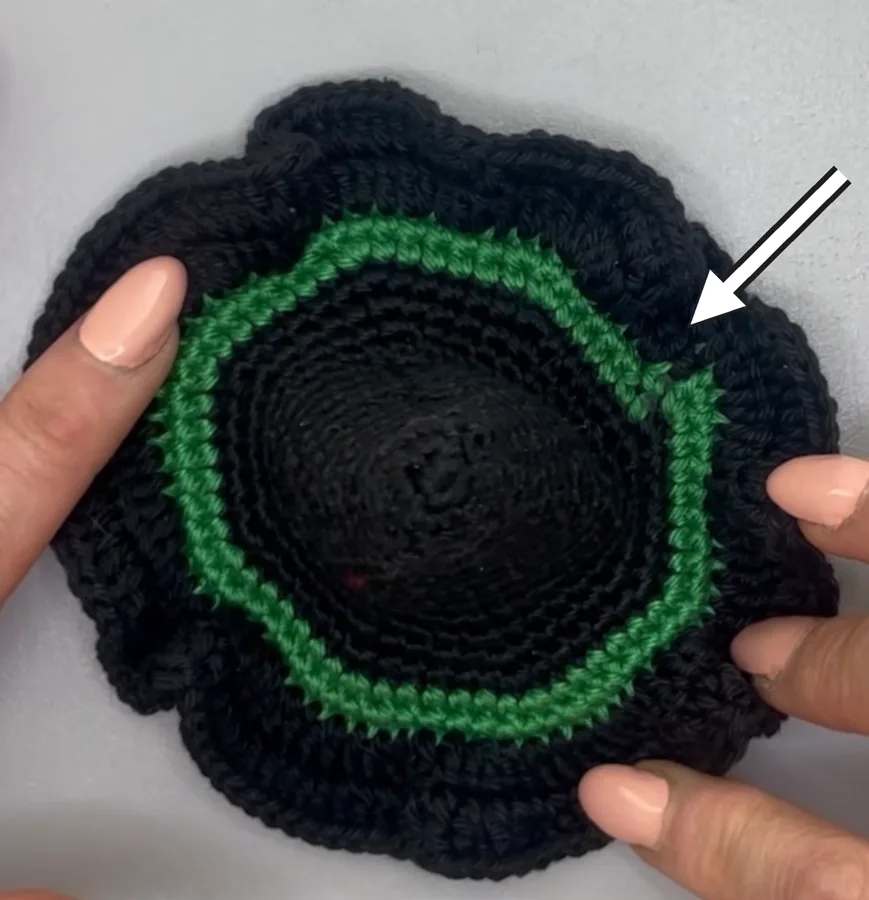
My Buddy the Elf pattern has the same thing in his hat, which I also did in spiral. When I made the other version in joining rounds, you don’t see that same height difference where the color changes.
Shaping that lands where I put it
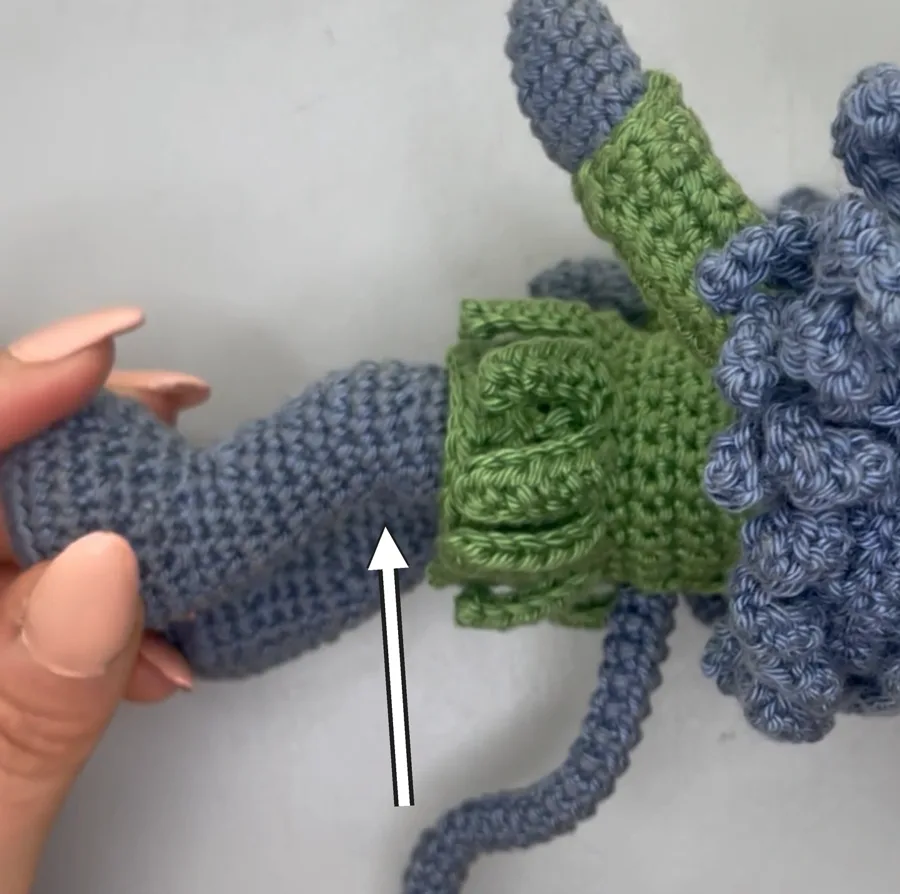
My flying monkey’s legs needed an indentation. This is how the rounds for that part of his leg are written:
Rnd 11: 4 sc, 3 inc, 3 sc, 1 dec, slst to close, ch 1 (14)
Rnd 12: 1 dec, 10 sc, 1 dec, slst to close, ch 1 (12)
Rnd 13: 12 sc, slst to close, ch 1 (12)
Rnd 14: 1 dec, 3 sc, 2 inc, 3 sc, 1 dec, slst to close, ch 1 (12)
Look at round 14. The decreases and increases have to sit in specific places for the indentation to form, and the count stays at 12. Those places are counted from the start of the round, so the start of the round has to stay put.
Not everyone stitches the same, and not everyone’s tension is the same. I didn’t want the indentation to vary depending on who was working my pattern. A joining round starts every round from the same place, so your hook lands pretty close to where my hook landed. There’s a little more certainty that your shape is going to look like mine.
That’s the part that matters most to me as a designer. A buyer is paying for the thing in my photos. Anything I can do in the way the pattern is written to make their piece come out like mine is worth doing.
The downside: a seam
The downside, which I don’t consider a major one, is that you’re going to see a seam where the rounds join. I don’t think it’s very noticeable, but some people don’t like it.
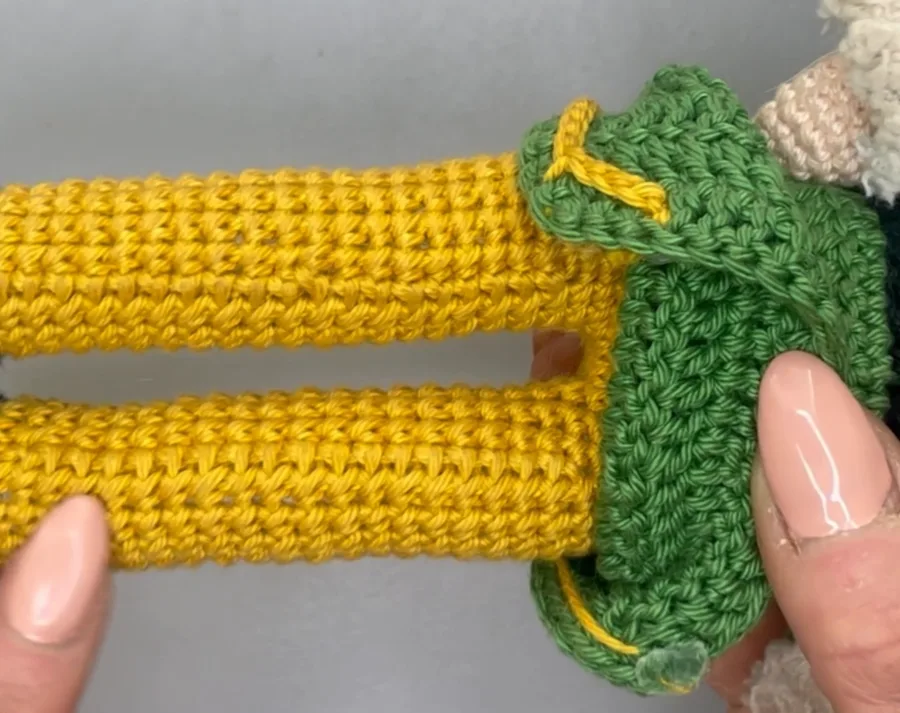
Buddy’s legs have a seam. But what’s nice about joining rounds is that his legs don’t twist. If I’d done spiral rounds for the legs, you’d probably notice a little bit of twisting. You don’t get that with joining rounds.
Side by side
| Spiral rounds | Joining rounds | |
|---|---|---|
| Moving to the next round | go into the next stitch | slst into the first stitch, then ch 1 |
| Where the round starts | only the stitch marker knows | the join shows you |
| Stitch marker | needed | not needed |
| Color changes | stack into a step | end level |
| Shaping placed in a round | can drift with the start | lands where it was written |
| Twisting in tubes like legs | can twist a little | doesn’t |
| Seam | none | a visible seam |
How I write it in a pattern
If you switch between the two in one pattern, the buyer has to know which one they’re in at every point, or the alignment is off. This is what I do:
- Say the default up front. My patterns say the default rounds are spiral rounds unless a section says otherwise.
- Explain the joining round once, near the top. Begin the round with a chain, work the first stitch into the same stitch as the slip stitch that joined the previous round, then join the last stitch to the first with a slip stitch, skipping the chain. I also link a video tutorial for anyone who hasn’t done it before.
- Say it again at the start of every section that uses it. “Work in joining rounds in blue yarn and 2.0mm hook.” And on the sections where it really matters, I add a warning that it will throw off the alignment if you don’t work in joining rounds where specified.
- Put the join in every round. “slst to close, ch 1” on every line, so nobody has to remember.
- Say when you switch. When the legs join into a body worked in spiral, my pattern says to work the body in spiral rounds, skipping the slst, ch 1 from the previous joining round.
If the piece has a chart worked in the round, it helps to number the chart the same way. The chart editor in NodeStitch has in the round numbering, where every round is read right to left, so the chart and the written rounds read in the same direction.
I’ve just been putting more joining rounds than spiral rounds into my patterns. Spiral rounds aren’t wrong. But for a lot of what I make, joining rounds make the pattern more predictable for whoever is stitching it, and that’s the job.
Counting rounds on your phone
Whichever way you write it, joined or spiral, the NodeStitch iPhone app follows the pattern with a round counter, a highlight bar on the round you’re on and reminders like “move the stitch marker”. From my projects turns a pattern you’re still writing on nodestitch.app into a PDF on your phone, so you can stitch it the way a buyer will before anyone else sees it.